Monday, December 8, 2014

Greenstyle Finnley's

Wow, 2 posts in one day!  I'm on fire...no really I've been a TESTING machine...I didn't even blog all of them...oopsy! Maybe I will make it up later!  Anyway little did I know that another one of favorite from all this recent testing was being released today!  


This is the Greenstyle Finnley Pants!  Aren't they Super cute!  This is like the very first version so my rings are a little bit different then the final version ended up being but SERIOUSLY I love this pair of pants!!!  They are already fading I have worn and washed them so much!  

The fabric I got from Purple Seamstress Fabric on Facebook!  She is where I find all my favorite knits at...love her stuff! 

But these pants are to die for! I chose to line the top of my pair with a white knit!  My husband always fusses if he sees any panty lines!  I even have a black pair of Under Armour pants and he claims when I bent over he could see my panties and I do promise I wasnt wearing any sort of grannyish panties....he must stare real hard, lol!  So to solve that little dilemma, I lined them, he happened to think it was funny when I turned them inside out to show him ;)  How I did it you might ask...I cut the pattern off at booty short length and basted it to the top of the pants and then carried on with regular construction...I did serge the bottom edge to discourage rolling!  Simple right? And no see through pants and no panty lines!


My 8 year old son took these photos and I really barely edited them!  He did good!

The pants have a couple different rises and instructions on lengthening and shortening them.  They are seriously comfy and a new staple to my wardrobe...sooooo much better then jeans!!!

So do yourself a favor and go check out Greenstyle Finnley Pants , also be sure to join the Greenstyle pattern group to see other tester photos and get help if you need it!!!


And BTW, your booty will look SUPER DUPER cute in these, lol, mine is just big and I think kiddos being shorter then me added to that in these photos, so not happening :)

Happy Sewing!


Nicole's Perfect Party Dress (CKC)


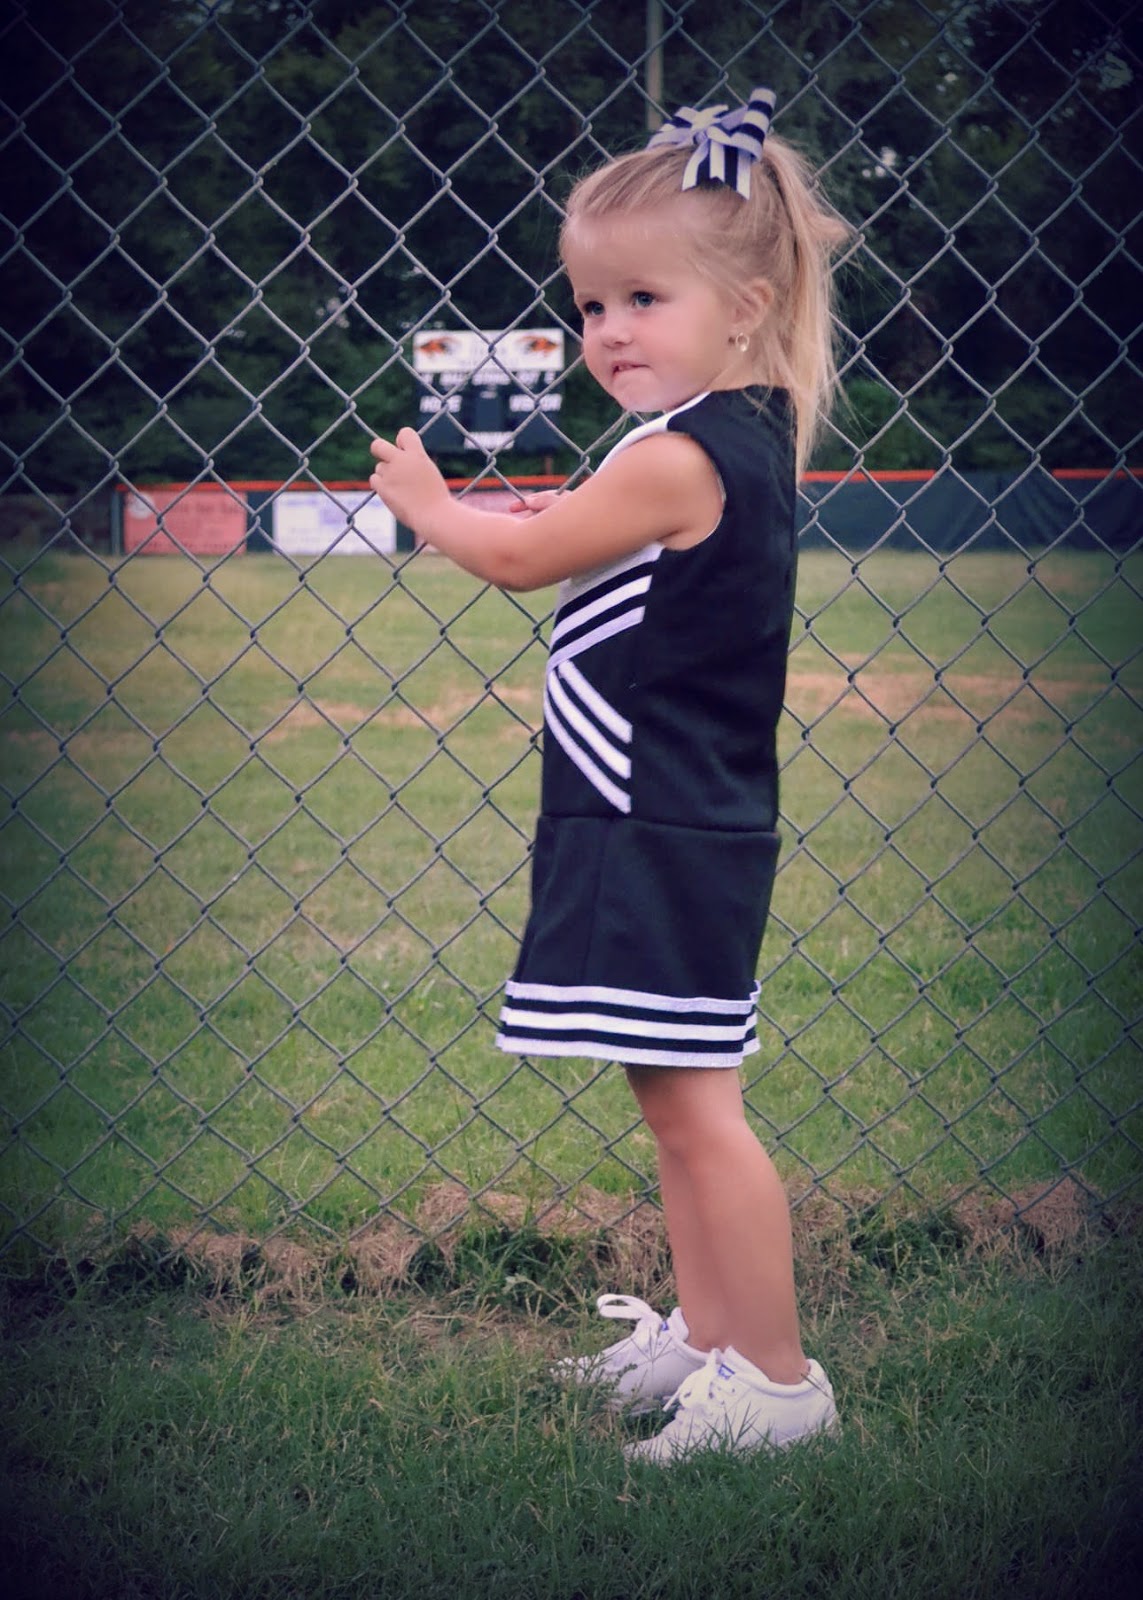
Today is finally the day, the long awaited release day of Nicole's Party Dress by Create Kids Couture.  I usually don't start a post off with just a picture but this time I had to, this particular picture is one of my FAVORITE's of my girl, and she's a beauty so I have a hard time picking usually...this one is actually framed and on display :)

The day we took this picture it was really windy and an icy cold wind at that, she's like her Mommy, grumpy in the cold so I wasn't dare going to torture her and make her go outside, it was during that Polar thing, I think that's what it was called! I know that lots of others had worse, but the Texas cold is just COLD for us because we aren't used to it, it's also different then the cold elsewhere.  We went skiing once (not that I did very good at it) and I was able to go without a jacket some and I know the temp was crazy cold, here...no way...when it's cold, it's cold. 

Point is, we had a pretty awkward set-up!  A fishing line strung from the bunk bed to the curtain rod with a piece of fabric clipped on it, the door wide open, me out IN the cold and her right in front of the door with the little cabinet heater pointed right at her!  She thought it was hilarious and gave me the prettiest smiles I coulda ever asked for!  I know I should've already re-done pictures in this dress, but I haven't...no excuses, just haven't done it, probably because I don't think I could ever beat the ones I have! 

Anywho, back to our dress!!!  I had a few different fabric choices, what you see, a red and green plaid, and our red velvet even came in time, but I wanted the blue.  It ended up being more of a WINTER dress, I was working on her "Christmas" dress at the time and looking for embroidery and came across these gorgeous scenes done in blue and designed for blue and I just couldn't help myself!  If you can't see it well, it's just a little wintery scene of a carriage and Christmas trees, probably not at all designed for a dress, but I sure got away with using it for one! 


I made the size 3 with flutter sleeves.  The Nicole comes with 3 different sleeve options, none, fitted and flutter.  The petti on this dress is also attached so that we aren't having to layer to get the fullness, which is great!  It's actually the first dress I ever made that way and I love it!  One thing I may personally do different next time for us is to add another strip of tulle above the one your instructed to do, and it may not even work.... With a heavier fabric it may not be an issue, but this was a lightweight woven so if she touches her skirt it indents and BOTHERS me, I'm sure as a 3 year old it's very high on her list of worries :) 


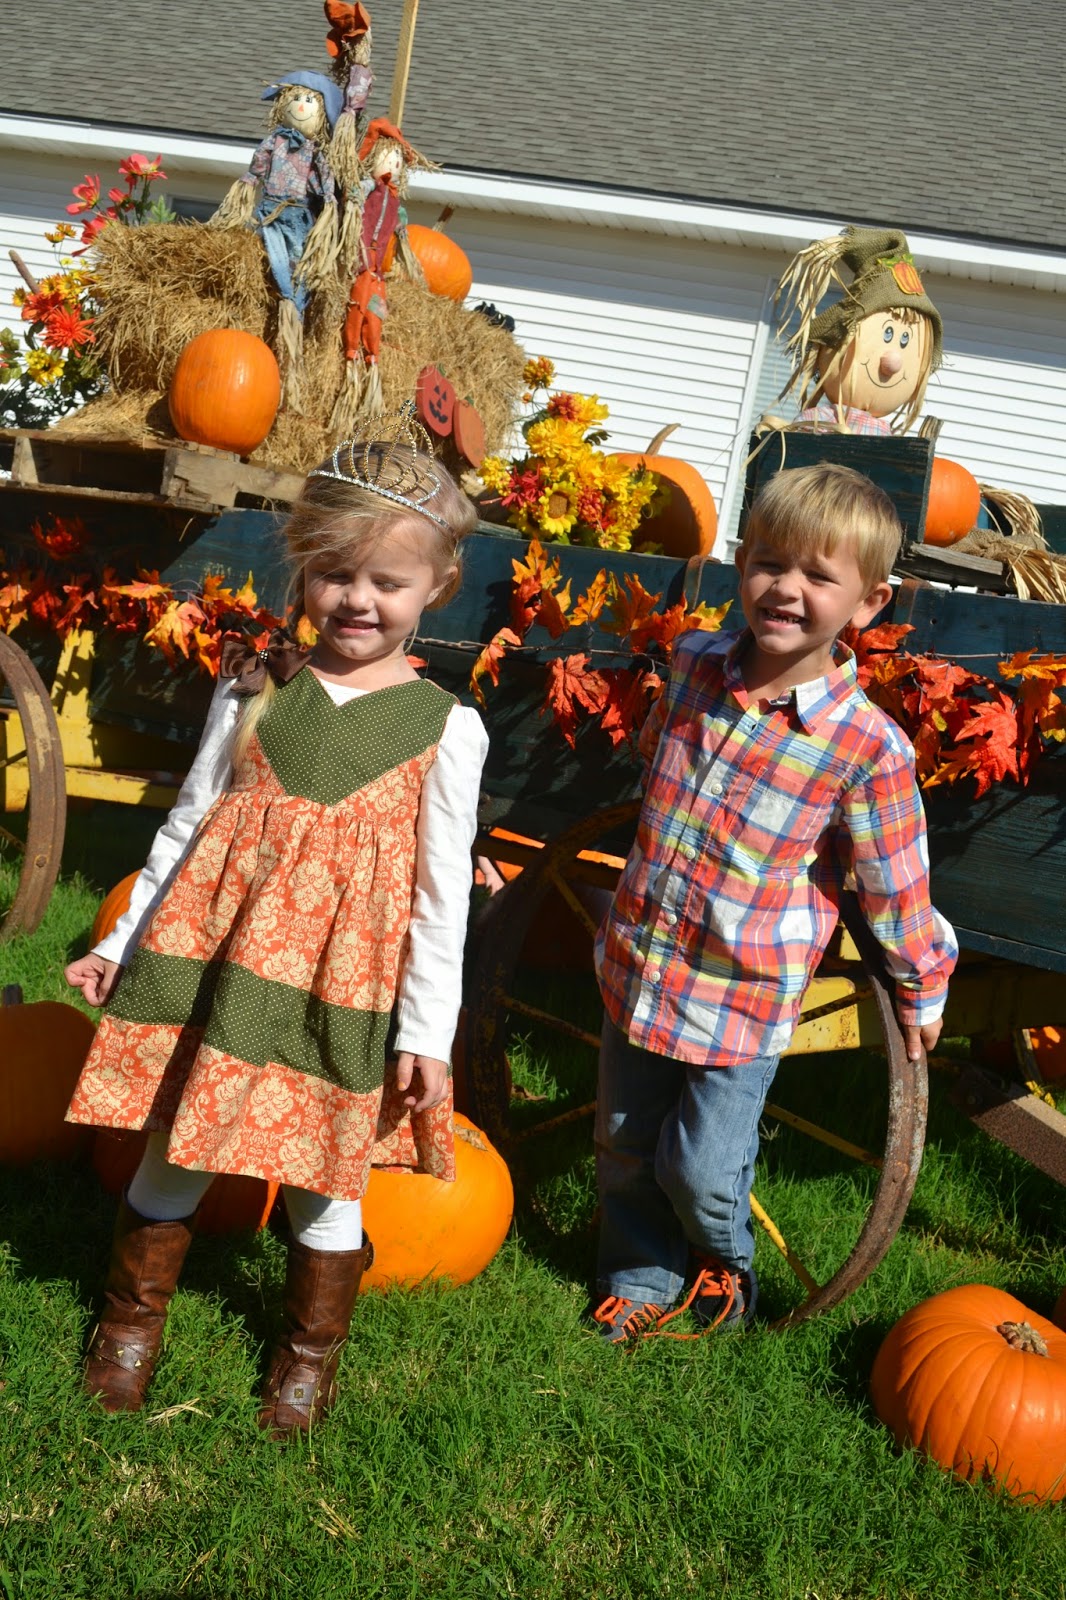
She's even already worn it out!  Remington's Pre-K class went to choose a tree at a local tree farm so ofcourse our "Party" dress was the most obvious to wear and play in because it had a tree on it!  This was by the way the tree she chose, Remington was lucky enough that out of 30 little kids, his teacher took HIS tree back to the church, so she decided she could tell his teacher she wanted this one too...she was quickly instructed that she would have to ask her Daddy...pictured there in the tan shirt, and he said NO!  We aren't happy with him because he wont let us have a real tree...darn allergies!!!  And no, we never have found a white sweater we liked this year and she's a goof that makes me button anything that has a button so you couldn't see her scene!  Regardless she had a ball and played in the Nicole with ease and looked beautiful while she was at it!

The front of the dress if you haven't noticed has 2 beautiful pleats that gives it a distinctive look, and the back...I just LOVE the back...


Isn't it gorgeous?!?  I love how deep the neckline is, I think that might be one of my favorite parts of the dress.  Nicole has 3 buttons,  if you can't tell, and ofcourse a sewn in sash so that you have that beautiful bow to adorn the back of your dress as well!  

And you all may look at this dress and think that it took a super long time to make...well if so your WRONG.  I was pleasantly surprised myself at how quickly this one went together.  I never try and time myself and I always have 2 little people needing this and that or fighting or "helping" me and I have to stop to go get this one or that one from school, but I know that even after I sewed the bottom skirt on wrong side out...so that the tulle touched her skin, which is a big no-no...and then fixed it, that this one still probably only took me 3 hours if that!  Kristen, the most wonderful, fabulous designer of this dress, timed herself and she got under 4 hours as well, and if I'm correct she has, not 3 like me, but 5 kiddos!  She made a post in the CKC Pattern group (which you will have to request to join) and had everyone guessing!  It's so much fun over there...if you aren't a part of it you should consider joining.  You will find some more fabulous versions of the Nicole and be able to get help on anything you may ever get stumped on!


I love this picture too, not sure why, but it's pretty to me!

Anyway, thank you all for stopping by and taking the time to read about my version of the Nicole.  I'm not sure what else there is that I can say about this dress since I have already professed my love for it!  Kristen and CKC have once again hit it out of the ballpark with this one as always so be sure you grab it while it is 30% off...they also always have tiered pricing over there too so take a look around and see what else you can find :)


Happy Sewing!


Friday, November 7, 2014

Maggie....Our Fall Dress (CKC)

Hi Ladies!  It's been a WHILE since I have shared anything...I'm so terrible!  But school, sick kids, LIFE!  It's just been crazy busy!  Anyway I have been sewing still, not quiet as much, but still sewing!  I was privileged to get to test a GORGEOUS new dress from Create Kids Couture...I've been waiting and waiting to get to share and today is finally the day!


This is the Maggie's Color Block Dress!  It's been a big buzz in the CKC Pattern Group(you'll have to join that one) since Morgan has been teasing everyone with it ;)  Her patterns are all so cute and I swear this one is no exception...I love it! 


It's different then any of the other CKC dresses that I have made thus far and not in a BAD way by any means!  It's fitted and closes with a button back that has a super cute keyhole opening!  It's adorable not layered as well and she's worn it that way already...I just never snapped a picture!  Here in TX, although it finally is actually cooling off for the whole day it's been 50 degrees in the morning to warm up to 90 by the afternoon, quiet annoying when you have to dress your kiddos at 6AM!


Her first trip out in her Maggie!  She wore it to the Pre-K's trip to the Pumpkin Patch, and yes that is a Pumpkin crown on her head!  To be able to spend the whole day in a tiara and believe that you are a Princess...wouldn't that be awesome!  She won Miss Personality at a local Fall Frolic pageant so when she asked to wear her Pumpkin crown and be a Pumpkin Princess, I ofcourse obliged willingly! That's her cute brother with her too...my middle son...he's so sweet...it was his trip, but little sis just had to tag along!!!

Anyway, that day was no exception to our wonderful Texas weather, by noon we were in the bathroom taking off the top...we woulda lost the leggings too, but she's not ladylike EVER :) As we were killing our 3 hours between drop-off time and field trip time in the Dollar Store she got her first compliment on the (Maggie) as well and when I told the lady that sewing it up took no more then 2 hours, she didn't want to believe me, but I swear it's the truth!  One of MY favorite parts about the dress is that the bottom is a BAND which means it's NO HEMMING of any kind...YAY for that, big time saver!


And here is the Maggie paired with CKC's free Peasant Top Marilyn and their SUPER CUTE Clarissa's Belted Pants as well as her "hunting shoes"!  The top does have added length to the sleeves, I used measurements from another CKC pattern but if you don't have one with the sleeve length you want and you don't want the short sleeve, I'm sure you could manage to just measure your little ones arms!  I went back and added a few white buttons to bring the white of the top into the outfit since I didn't have any off white fabric and it works!  I think it looks precious and I plan on this being her Thanksgiving outfit and its great for any other day too...I have a hard time making a SPECIFIC outfit for ONE DAY so I try and do something like this so we can wear it all season, but it's still appropriate for the DAY!

Another option that this pretty little dress has is a sash...I meant to do it, I have it cut out, but her Daddy liked it without and so did I and then when I went back to fix the rest of the outfit I still meant to do it but I still liked this one without, lol!  But the way its made it would be very easy to wear both ways on different occasions!  You will love it and you'll have to go check it out elsewhere since I didn't get around to it so I could photograph it, sorry! CKC Pattern group will have a lot of shares I'm sure! And I think I might have forgotten to mention that this dress has an AWESOME twirl factor!!!


Anywho ladies thanks for spending a few with me today!  As always I give props to CKC, I love them!  Morgan knocked it out of the park with Maggie!!!  Go check it out, when they release new one's they are always 30% off for 24 hours and tomorrow half off week-end begins...they also have a special Monthly Mixup with a PACK of patterns that you def shouldn't miss!!!

And I'll send you away with a few more pics to make you love (Maggie) even more!

Happy Sewing!


Monday, September 15, 2014

Birthday girl! (CKC Skyler)


Isn't this darling girl beautiful!?!  She just turned 3 years old!  And as you can probably guess she is infatuated with FROZEN and Elsa & Anna, so ofcourse she had a Frozen themed party with a Frozen themed dress!  The Frozen fabric was a pre-order from Sew it Seams, you will have to ask to join the group, but I have gotten some great fabric from them without the crazy mad dash to a fabric store hoping to catch it before it sells out!  The coordinating fabric came from Mama Made and Beautiful another of my favorite fabric groups!  It is more of a green shade, but after it was all together I loved it, it has little snowflakes on it if you can't tell!

The pattern I used for this dress was CKC Skyler's .  It's so pretty, there is also an option for a patchwork skirt as well!


And then the BEST part, the BOWS!  Oh My Goodness, if they aren't just divine!  In this dress you will need to choose very wisely based on measurements since the bodice is fitted.  I made Miss Gracie a 3 and I had to pull those bows just as tight as I could, BUT I did it on purpose since it should start to cool off soon and I want it to fit her next spring and summer.  I'm usually pretty good with tying a pretty bow, I learned how from some random tutorial I found on Pinterest, but with these little bows it didn't work out.  CKC saved the day though with their wonderful tutorial, they are perfectly straight everytime now, even if you don't make THIS dress, be sure to go and read that!

There was no issues with this pattern really so I have no special tips, the only thing I did any differently was to make the ruffle a little wider then called for!  


Isn't her necklace pretty too?!?  I special ordered that from Jax & Jewels...I sent her photos of the fabric and she matched it perfectly.  She has beautiful necklaces!


Just wanted to share this pretty dress with you all, thanks for spending a few minutes with me!  And I would definitely advise adding this one to your collection!


Thursday, September 11, 2014

Isabella Pleated Dress....Squirrelalicious (Ollie and Annie Collection)

Wow, how has everyone been?  Today we celebrated my little girl's 3rd birthday!  Everyone is in bed and the house is quiet, I have a few posts I need to take the time to make to show you the new backpack, the dance bag and the birthday dress, but not today!  Back to school has worn this Momma out, I'm actually up cutting out the pieces for an Elsa dress so I can give it to her at her party this weekend, but I wanted to take the time to share with you this awesome new pattern I was given the opportunity to test!


This is the Isabella pleated dress by Ollie and Annie Collection.  Isn't it adorable?  I will go ahead and tell you upfront the dress version is supposed to be longer then this, atleast to your knees and your waist line will probably be a bit lower, but that was my bad during testing :) As I have already mentioned BTS is beating me up, but when I make commitments to do these things I follow through, and I've found I need sewing a little bit for my sanity so I managed to fit this in!  When I told Ms. Stephanie Gracie Bug's measurements she gave us a 2 so I just said ok!  We most definitely needed a 3 in length for this girl!  It's all good though because this dress also comes in a tunic length and I just love it with these tights...I may get her some that are thicker and not see through for this dress, but she looks just divine!


If any of you follow Zulily you may remember seeing the little a-line jumper a while back with the squirrels on it!  I immediately fell in love, but I don't think I liked the price a lot so it went on my list of to-dos!  I've known this jumper was coming for a while and had kept the squirrel idea in the back of my mind the whole time....it won!  I found the embroidery design at Sweet Peas Place...I actually bought like 6 designs from her just a couple of weeks ago and I have used all of them except for 2...she has some pretty awesome stuff! My machine was acting up a little bit so I couldn't complete the flowers on our little girl squirrel, but I have enough on there that no one will ever know unless I tell so I decided the other squirrel could just be a boy since they are in fact with a heart...it by the way was a freebie from Original Stitches, how awesome is that?!?

And do you recognize the top...it's our High Low Tide Top by Patterns For Pirates! I loved the print so I thought why not, it worked out wonderfully! 


Anyway back to our Isabella!  The back of this one is done with button and loop closures, very simple to do and super cute!  Covered buttons would be awesome I think, but for the simplicity of our dress I just went with plain gold buttons, they actually match her boots pretty well...I scored those at Davis Country Store for 1/2 off the other day!

And on to the most difficult, NOT DIFFICULT at all part of this dress...the pleats!  This is only the second time I've ever made pleats and with the Isabella Stephanie has a chart for the back and the front that makes it incredibly simple...no measuring and marking, no eyeballing, you just match your fabric to your chart and mark it!  I marked this one on the right side and after I got started I realized it would've been a lot easier had I marked the wrong side, BUT, I still managed.  Her directions were simple for me to follow...even when I made the super huge mistake of cutting my fabric a few inches too long or actually probably NOT unchecking the FIT TO PAGE option when printing so my pleating chart was OFF (not sure which was the problem) BUT ALWAYS MAKE SURE YOU UNCHECK THAT OPTION WITH ANY PDF, it's very important...I was able to just use her directions and add an extra pleat to each side on the front and back and solve the dilemma :) All in all I'm super pleased with my first major pleating project, a lot simpler then pulling strings and making ruffles and you have a super pretty result.  

Thank you all for spending a few minutes with me today!  I'm about to have to run and pick-up m big ol' Pre-K boy, yes, I did start this last night and then decided sleep was a little bit more important!  

Make sure that you keep an eye out on Friday for the grand release of the Isabella Pleated Dress by Ollie and Annie if you use code ISABELLA20 you can save 20%...FRIDAY ONLY and make sure to go over and join the Pattern Group as well!  I think Stephanie has a blog post about this dress so make sure you check that out too! I can see this done in plaids for Christmas and VELVET...so many ideas, I think it's an absolute must have for any collection and as always it's an easy to follow very well written pattern!


Happy Sewing!


Monday, September 1, 2014

Oh Mickey CHEERLEADING Uniform! (Cole's Creations~ Oh Mickey)

Hi, today I am absolutely, completely and totally excited to share one of the most amazing outfits I think I have ever made my daughter :) I think I am just super excited because it's a CHEER LEADING uniform, and it's not like a cheap little costume like thing either, it's the REAL deal!  My son is playing in the pee-wee football league right now, he's 8 so he's on the Junior team and this is actually only the second year I knew anything about it, he just really wasn't into it last year but I talked him into it for my very own personal reasons this year (so I could make sister a uniform) and OMG if he's not the CUTEST thing ever! Ofcourse when they saw Miss Cutie bouncing along behind me they said "Oh MOM, we have cheer leading!"  Don't think I didn't already consider it, but baby girl is not quiet 3 yet and $110 to cheer on a younger team that my LITTLE boy isn't even old enough to play on...NO THANK YOU!  But, a cheer leading uniform she WAS getting.  Now I had looked though all my patterns several times...I had checked through several blogs trying to learn how to do the various pleats and I had just about narrowed it down WHEN there was a tester call for Oh Mickey Cheer Leading Uniform by Cole's Creations!


I told you this one is for real!  I never would've really known what sort of fabric to use and I am sure that trim would've just been ribbon had I not stumbled onto this...even if I hadn't been chosen to test I know I would have been first in line to BUY!  I've had a hard time finding out the little teams actual colors and he hasn't gotten his jersey yet...first game is next Saturday...YAY...but I am positive that they are Lightning and in the past they have been Black and White and I have sorta been eavesdropping on the cheer practice and have heard BLACK and seen black and white poms so I hope I'm safe, if not she will still be the cutest wrong color cheer leader EVER!


I used PONTE to make this found online at Hancock's on sale for $5.99 a yard so I lucked out! The ponteroma she said doesn't hang just right so only use it for the contrast if you have to. This is a size 3 so I bought one yard of black and 1 of white...obviously I barely used any white but that's one of the icky things to me about ordering online is that I usually almost have to order the full yard, on Fabric.com you don't have to, but sometimes it's pricier then other places and while most of the time their shipping is fast sometimes it's NOT, so I skipped them this time and just ordered the full yard!  I also had a lot of the black left over as well so that tells you that this one is def not a fabric hog by any means!  The trim I found at Malouf's Fabric.  Their shipping was super fast as well!  I believe you can also find your trim on E-bay and grosgrain ribbon and striped knit are perfectly fine to use as well and Nicole outlines all of that in the pattern with great detail!


I chose to find and purchase the lightning applique from Big Dreams Embroidery on Etsy to match Aiden's team, but the great thing about Oh Mickey is that you don't have to have an embroidery machine to get a super cute look for your uniform.  In the pattern she includes a star, megaphone and a paw print with instructions on how to applique them with your regular old sewing machine!  You wouldn't even have to use her templates, you could find any old thing you wanted, trace it off your computer screen or print it out, and then use the instructions provided!


The back of Miss Gracie's uniform is closed with a zipper, however if you aren't comfortable with installing a zipper, she has included instructions for snaps as well as velcro.  Zippers are also not a thing to fear.  This is my 5th one I think so I am fairly new to them and this is perhaps the prettiest one I have done so far, her instructions for installing it are GREAT and they gave me a very neat and pretty finished product.  Silly me didn't even think about closures when I was scrambling to order materials so I didn't even have a black one here, but I did have a brown one which happened to be an invisible zipper so all you can see is the little brown pull tab, which even with her hair in a pony tail is covered...I think a black permanent marker might fix that problem ;) 


Another thing that may be useful for you all to know is getting this pretty little outfit on!  It's been I guess 11 years now since this Mommy has squeezed herself into a cheer leading uniform and I forgot how hard they can be to get on and off.  I finished the bodice up on this pretty and ran to put it on her and just about broke her neck, lol, not really, but we had a HARD time over the head...I think the back opening has been adjusted to make on and off a little bit easier, but I figured out that my problem was that I was going about putting it on the WRONG WAY!  NOW, with the original zipper length still in place I have her step into it and slip her arms in the holes as soon as they are high enough she can do so and the outfit slips on like butter.
In high school I was a tiny little thing, my mom had to take up my uniform every year so it would fit me but after the fight I had squeezing it over her head I remembered how much trouble I used to have getting mine on alone...I didn't have the option to step in as we had 2 pieces with a side zipper and tiny as I was I have always been blessed with hips so over the head it went and it was a dance if I had no help, lol, that's just how cheer fabric is, I can even recall getting stuck sometimes...but with this one being one piece have your girly's step in and get those arms through just as soon as you can and you will be fine!


I really wish I had better photos to share with you, but sometimes when your 2 it's just not super fun to have to take pictures ;)  and then there are camera problems...like not charging the battery...who does that...ME!  But anyway, I LOVE LOVE LOVE LOVE LOVE LOVE LOVE...should I say it again LOVE Oh Mickey,I love this uniform, I just love everything about it.  It has made me happy as well as to go  cheer leading crazy again...I just put her in tumble and cheer, lol!  She also announced to us after seeing the Dallas Cowboy cheer leader commercials that she wants to be a cheer leader like that...so that is now our goal...not really, but...you know, if she says she wants it I will support her, however I'm pretty sure a not even 3 year old totally know's exactly what her life goals are already ;) But as long as she's saying it I'm all for it!

Oh, I think I forgot to talk about the awesome cheer bow!  There is a free tutorial for that listed on Craftsy today so make sure when your getting the uniform you get that as well!  It's super easy and I just used some of the trim I had left!  There is also a matching Dollie Outfit and free poms for dollie! You can totally use them on your darlings shoes as well!  Also, I haven't gotten around to making it yet, but it just hit my cart ;) is the Spirit Jacket! With a cheer leading uniform it is now a MUST!

So most definitely go over to Cole's Creations  and give this awesome mother - daughter team some love and check out Oh Mickey Cheer Leading Uniform and get it while it's 40% off...as a matter of fact I think the whole shop is 40% off so make sure to check it out!

You definitely won't regret having the Oh Mickey Cheerleading Uniform  in your collection, it's great for cheering on big brothers...going to those Friday night games we can all get so wrapped up in, in Texas anyway, or just watching and supporting Daddy's fav pro or college team (we like the Texas Longhorns).   It's also great for a Halloween costume.  Nicole did mention that she thinks made from corduroy that it would make a super cute jumper as well!  The placement of your trim is totally left up to you with a few helpful photos and hints from her too...you will honestly LOVE this pattern!


Also don't forget to head on over and join Cole's Corner and Creations Patterns Group!

Happy Sewing and Happy Labor Day!!!


Friday, August 29, 2014

Back to School (CKC ~ Benjamin, Brandi, and Junie)

Hi!  How has first week back to school been for all of you?  There's been loads of craziness around here and next week promises to get even crazier as my BABY boy starts preschool....ahhh, where has time gone!?!  He will be 5 at the end of November, a big Daddy's boy and MINE only when he's at work ;)  Poor fella has never really been away from us so this is going to be crazy hard!  My oldest started 3RD GRADE, they are all just growing up TOO FAST! Not to mention football practice twice a week and the fact that I signed baby girl up for dance...I think I thought I was super mom there for a minute, but I will get through it...I may need to sew myself up a cape or something!

But anyway, today Create Kids Couture is releasing their back to school patterns!  I had the privilege to test 3 of them! Benjamin's Polo Shirt for boysBrandi's Ruffled Polo Shirt for girls, and Junie's Everyday Skort!  You can grab all of them for the next 24 hours for 30% off...today is also Half Off Friday as well as there being 4 other new patterns out on sale too!  I would definitely go and take advantage of tiered pricing while so many things are on sale ;)  How do you think I ended up with SOOOO many CKC patterns, it's kind of addicting!?!

First things first I will show you all Benjamin's on my big PRESCHOOL boy!


I found this fab dinosaur knit at Purple Seamstress Fabric, I got the white from there as well, I really didn't know what I was going to do with it when I ordered it, but when the fabulous Kristen from CKC allowed me to take part in the testing on this one I knew what I was using it for.  I also let him pick his own buttons :)  He tried to get MONKEYS, but mom had NO monkey fabric and no time to search for any so we compromised, these big guys were a little bit hard to sew button holes for especially with my crazy...I DO NOT MAKE BUTTON HOLES...Singer, but we managed.  I also made a bad thread choice!  I thought black would be cute and it was except for those crazy big button holes, lol!  We live and learn and this guy, well, this guy LOVES his shirt and that is all that matters!


One little tip I will share, the placket is NO BIG DEAL at all so don't let that scare you, but it gets SUPER thick so I would definitely recommend slowing down, and taking your time and making sure you have a heavy duty needle in hands reach to sew the last 2 little lines where you connect everything there at the bottom...I broke 3 needles, but I did it!  And now my super cute preschool man has an awesome Mommy made shirt to remind him of me when he's missing me ;) You can make the collar and placket with wovens as well which I think would definitely cut down on the bulk factor and it also comes in the short sleeve length!

Next we will talk about Brandi's and I paired it with Junie's, but if you read all the way through I have a fun modification to share with you about that one...YAY!


This pretty girl is 10 days short of being old enough to start Pre-K in the younger group...but that is OK...this mom couldn't deal with EVERYONE leave her...not yet! But that doesn't change the fact that she has lots of super new Back To School clothes to wear to the boys school things anyway ;)

Kristen designed this one as well...she does such a great job and I also got the white knit from Purple Seamstress Fabric, her solids are like $6 a yard and she has tons of colors! All the woven used on this one came from someone's stash that I purchased from our local swap page!

For this one I used the woven option for the placket and the peterpan collar as well as a folded ruffle!  Luckily she just chose normal purple buttons and I promised her a jacket with them so I got to use pretty normal pink ones here.  I honestly LOVE this outfit so so so much! I still need to make a plain one for layering.


I loved it so much I made 2!  Really I made a big boo-boo....remember to check your measurements when you are working with knits.  It seems to be something with her build or maybe just my preference of how clothes fit her, but I make her 3's in woven all the time and they are perfect, but in a knit they can be a bit big as most are designed to fit little girls snugly.  There were a few kinks worked out during testing for this one, that's what testing is for after all, and as soon as I saw others with fit issues and BUG looking all cute I realized that I forgot to adjust sizing for knits...anyway we went with 2 since she has a 20.5" chest measurement and I love the fit! 

I will also touch on the pants there...I used Olivia's and added another big ruffle as well as using the waist height from Brenna's to try and achieve more of the paper bag waist  look, I ended up just roll hemming the top of them and adding the elastic right on the inside with zigzag stitches!  I also added the pockets from Dahlia's to the back as well! Then I finished it all off with a sash with her name embroidered on it! They were a crazy mash and I'm OK with them, but I think I may stick to an original pattern next time!


As far as the placket on this one it's about the same as Benjamin's, except it gets even thicker with the ruffle, but I mean, you have to have a ruffle, right?!?  If I had used woven for Benjamin's, I don't think I would've had any issues at all as I didn't with the little lace Brandi that I have pictured a couple photos up...no broken needles and all lines sewed first try :)  But this Brandi was a complete different story for me because I folded the ruffle in half and added yet another layer of bulk...be very slow and use a heavy needle and you should be ok! This top also comes with a great deal of options, 3 sleeve lengths, peterpan or regular collar, ruffle, no ruffle, or a couple different looks for the ruffle!  It's a must have!

Now on to Junie's, I haven't even shown you a good photo yet...but you can see the little shorts peeking out there as she is sitting :)


Junie's is a skort that was designed by Nikki!  I just LOVE that the shorts are sewn straight into the waistband of the skirt, my little girl is NOT lady like so they make a world of difference for us as I hate panties showing!!!


See?!?  But isn't that a precious picture!  You also may notice if you've looked at the pattern already that you don't see a ruffled one.  She has the option for a short knife pleat and the long knife pleat and the plain skirt.  But she was kind enough to allow me experiment and fix one with a ruffle!!!  All I did was use the measurements for the short knife pleat and instead of pleating it I just used a gathering stitch and ruffled it...simple as that and you get a completely different girly girl look!  I LOVE it!  I bet it would be the same difference to use the long knife pleat and make a gathered skirt too.  Nikki has told me that she plans on doing a blog about this as well so when she does I will link it back here for all of you!

I realize since I was going over 3 different patterns that this post got a wee bit long and for that I apologize, but thanks for sticking it out and make sure to go give CKC some love and check out all the new patterns, Benjamin'sBrandi's, and Junie's.  Actually if you just use the SALE link you can see all the new ones and HOF!


Happy Sewing....I'm off to make a CHEERLEADING uniform for Cole's Creations...eek...it's all cut out and I'm super excited so be on the lookout!